
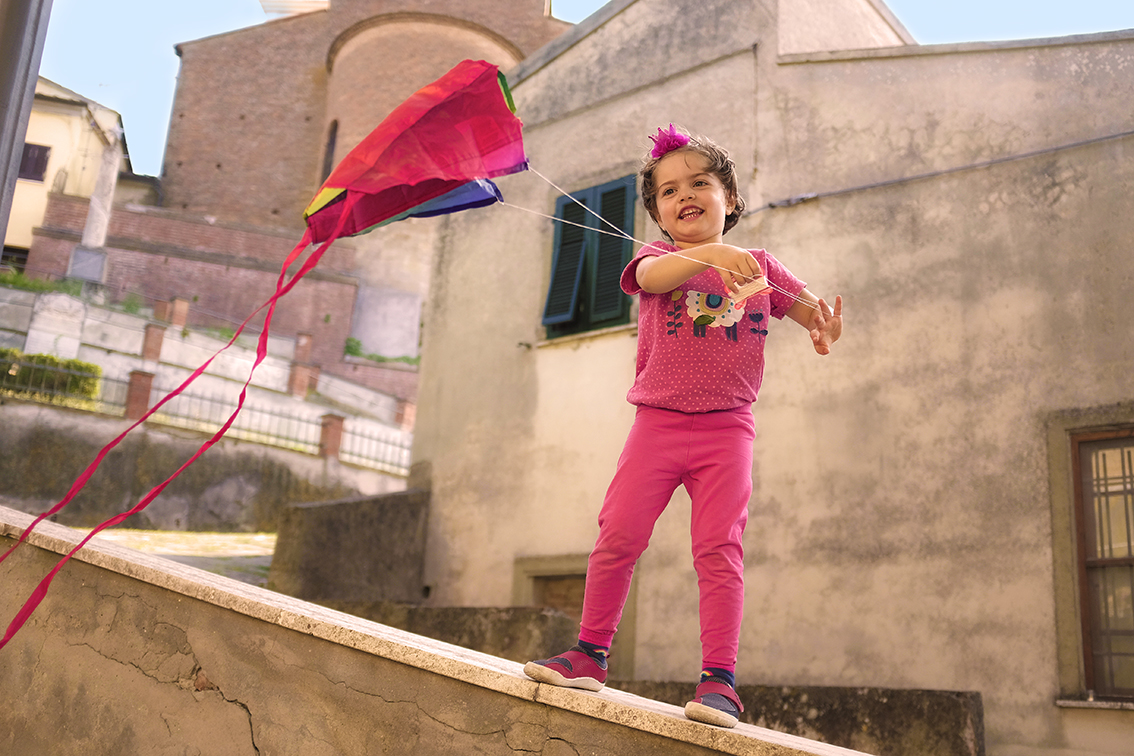
We have been very lucky to live in a place where it’s windy in the afternoons. Not too windy, but just enough to be able to fly kites every day. The other day we went out in the center of our village, and all the kids wanted to try Adèle’s kites. We took 3 different ones, but that was not enough to share with everyone. So the next day I brought a few household materials (read below) and taught the children how to make their own kites. It only took a few minutes, so I’m sure you can find the time to try it even today.
WHY SHOULD YOU MAKE A PAPER KITE?
- Making your own kite and then flying it gives a sense of accomplishment and wonder.
- Designing a kite is a creative activity that helps your child express herself and supports her development.

- Making something functional from a common, simple material like a piece of paper is empowering and educational. It also involves mathematical concepts, so this activity is very suitable for STEM education.
- Kite flying activity slows down your child and helps her learn about patience as she waits for the wind.

- Flying kites helps your child notice and feel the wind. To give you an example, when we were flying kites with our 5 year old neighbour, he kept on saying to me: “It doesn’t work. When will the wind come?” So I would point to the trees and tell him to watch the leaves move. After a few tries he started to notice the wind and his kite was flying high.
- Watching the kite fly is meditative.
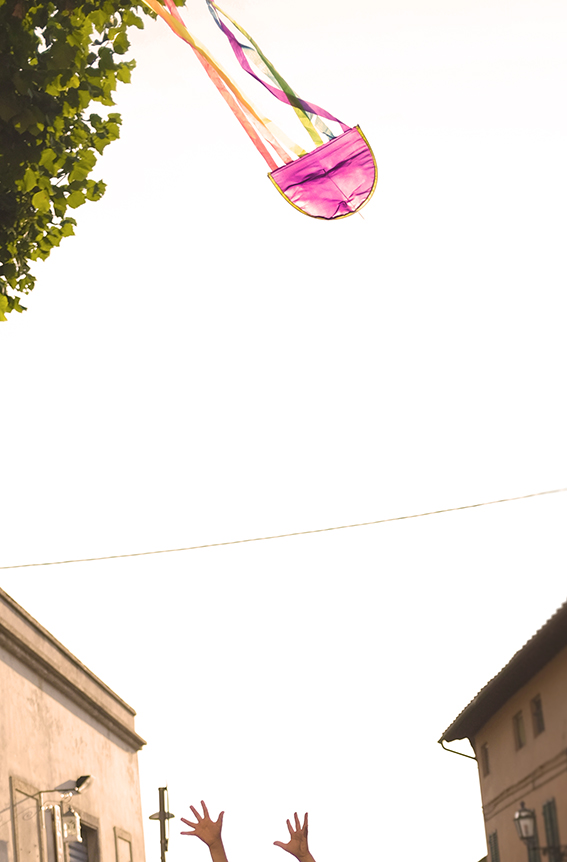
- It is also a wonderful way to connect with your child. For example, you can either fly different kites together or fly a kite while your child tries to catch it.

A DIY ORIGAMI PAPER KITE THAT’S EASY, FAST AND FUN TO MAKE
The kite that I’ll teach you make is a traditional Turkish kite called “Şeytan Uçurtması.” It means “Satan’s Kite,” but don’t be scared by the translation. The beauty of this kite is it’s simplicity and function. It really DOES fly and is easy enough for preschoolers to fold. I did this activity with kids 4 through 10 and they all made their own kites. The only thing you’ll need to help smaller kids with is tying the knots. Let them do all the rest.
Materials
***Disclaimer: This site contains affiliate links, and if you decide to purchase anything from suggested links or companies, I may receive a commission. Recommended products are either things I love sing or think would be helpful for you. Making your purchase using these affiliate links helps keep this site running, so thank you kindly!***
You will need the following household items:
- A piece of any light, square paper. We like to use Kite Paper
since it’s lite and transparent and catches the light beautifully. We have also successfully used colorful origami paper.
- Sissors (the ones in the photo that Adèle uses exclusively are IKEA MÅLA Scissors
)
- String
- hole puncher
- A piece of cardboard or a toilet paper roll
- Scrap paper or plastic (optional)
Instructions
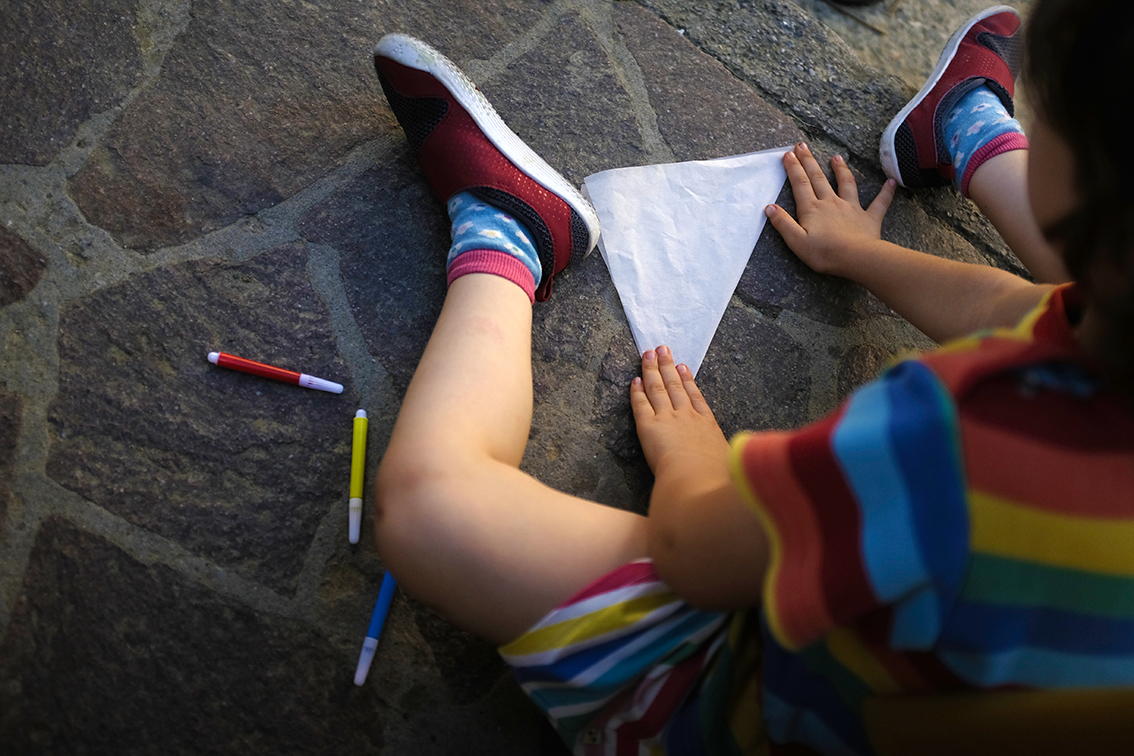
There are only 3 folds necessary to make this kite. It will fly with even one fold, but not as well.
- Fold one corner to another to make a triangle. (Younger children can stop here and skip to step 4.)
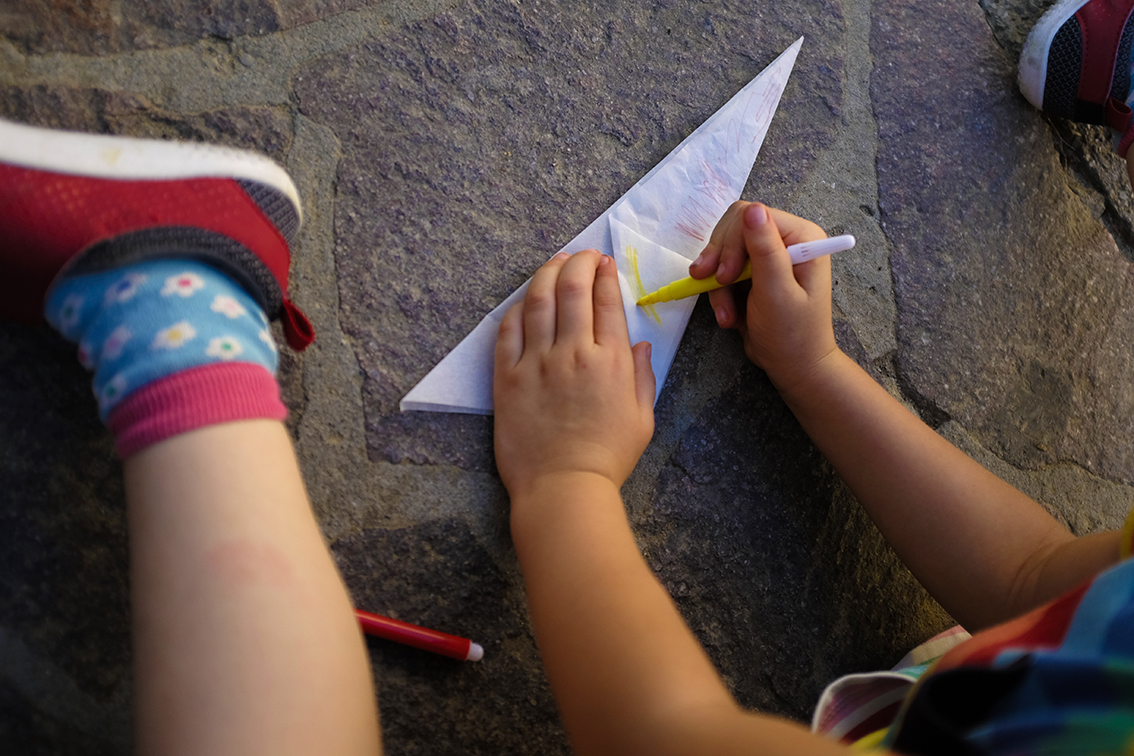
- Take the tip of the triangle and fold it to the straight edge. Repeat on the other side.

- Do you see the horizontal line in this image? Hold the corner that’s not attached to anything, and fold it back to form another triangle as pictured.

- Now that your kite is ready, it’s time to decorate it.
- The last step is to punch holes in the little flaps you made in step 3 and attach the string like so.

- Use a piece of cardboard or a roll of toilet paper to wind the string.

- Go have fun now and report back! 🙂

TIPS FOR A DIY ORIGAMI PAPER KITE
- You can use Origami Serenite
paper (or coloring pages that you already have at home). Color in the motifs before folding the kite. This way you can do two separate creative activities that lead to one final product.

- Shorten the string and attach the kite to the back of a pedal bike. Caution: make sure the string is short enough that it doesn’t get caught in the wheels!


- Use scrap pieces of paper or plastic bags to attach a tail to your kite.
- If you don’t want to do any folding, you can actually just attach a string to an interesting piece of paper and it will fly. Try cutting a fun shape out like this butterfly, for example.

DESIGN YOUR OWN KITE KIT
If you don’t want to build your own kite, you can still buy a blank one that your child can draw on herself. There are a few simple options on the market that allow you to design your own kite. Some even come in packs of 3 so they can be used for parties or by siblings / friends.

- In the Breeze White 30 Inch Diamond Kite
– Comes with a kite line and a bag
- In the Breeze Coloring Diamond 20 Inch Kite
– Comes with crayons, a kite line and a Bag. Instead of using the included crayons, I recommend using non toxic crayons.
- Mint’s Colorful Life Design Your Own Kites for Kids
– 3 kites, great for sharing.
And if you’d also like to try some ready-made kites, here are some beautiful ones for beginners:

- HENGDA Red Fox Kite
- aGreatLife Huge Rainbow Kite For Kids
- Vivcy Beautiful Large Orange Software Octopus Easy Flyer Kits for Childre
If you liked this creative idea, save it to Pinterest so that others can try it too! 💖

