
Are you looking for a calming art experience for your child? Do you want to introduce art to a child who does not naturally gravitate to art-making? Did your child have a difficult day and is in need of some art therapy? Or are you looking for a unique art activity to do together with your kids? If you answered yes to any of the above, I have one word for you – SUMINAGASHI!
WHAT IS SUMINAGASHI? Suminagashi is a Japanese art form and literally it means “floating ink.” Adèle calls it “The magnificent, quiet activity.” The idea is very simple – you float ink on water to create marbled paper. When first invented, Suminagashi was used as a meditative exercise. It was a way to connect human energy (“chi” – movement) with nature (water). Here is how we do it in a child-friendly way.
USING SUMINAGASHI AS A MINDFULNESS PRACTICE
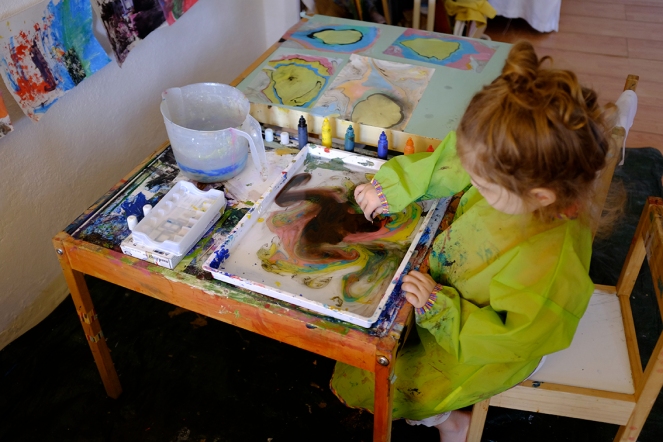 Adèle uses Suminagashi as a mindfulness practice. When the water is still, pigments make rounded, beautiful shapes. When the water is agitated, colours get mixed together and shapes look chaotic. The same is true of emotions, and this is why Suminagashi is our favourite meditative art activity. Because she has been practicing this art form for a while now, whenever Adèle feels strong emotions approaching, she spends some time in her studio doing Suminagashi. It balances and calms her mind and marbled paper starts looking more harmonious.
MATERIALS
***Disclaimer: This post contains affiliate links, and if you decide to purchase anything from suggested links or companies, I may receive a commission. Recommended products are either things I love using or think would be helpful for you. Making your purchase using these affiliate links helps keep this site running, so thank you kindly!
- A white shallow tray
is best (you can use an baking tray or dish as a substitute).
- Suminagashi Ink
(As a substitute, you can use watercolors, tempera or any other paints you have at hand. Just dilute them with water as they need to be light enough to float.)
- Water
- Absorbent paper (rice paper
, charcoal paper, block-printing paper or any thin paper like computer paper – experiment to see what works best for you. The less absorbent the paper, the blurrier the image will be. Rice paper is very fragile and difficult to work with so I recommend it for older children.)
- A calligraphy brush
that stays pointy when wet works best (if not using marbling inks)
- Toothpick (optional)
- Dropper
(optional, but check out these ones
– they are perfect for art activities since each one can be used for a different color!)
INSTRUCTIONS
- Pour water into the tray

- If using marbling inks
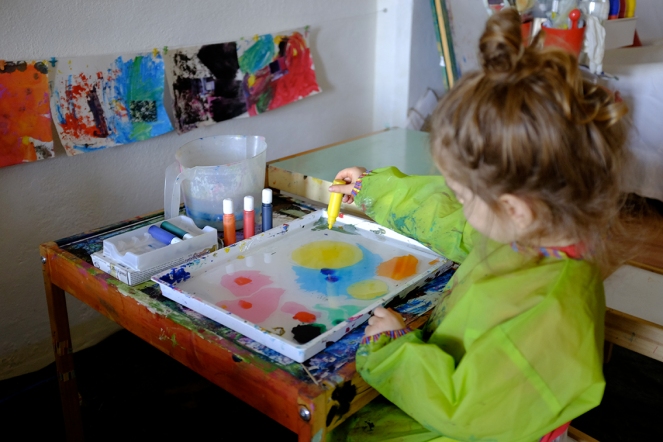
- Squeeze as many drops as you wish.

- Try squeezing some on top of the ones you already made and see what happens.


- Use a toothpick (or the tip of a paint brush handle, a sharpened pencil or anything similar) to to move and swirl the pigments.

- When you are satisfied with the image, gently put a piece of paper on top. After a few seconds, lift it off, holding it by the corners.
- You can continue making more prints using the same water. However, if you want to start with cleaner water, then use scrap paper to lift off excess inks.
HELPFUL TIPS

- Mix colours in small containers and use a dropper or a paint brush. This way you can create any color you want and learn about color mixing in the process!
- Try blowing gently to make the water move. Focusing on the breath in this way also helps sooth the mind.
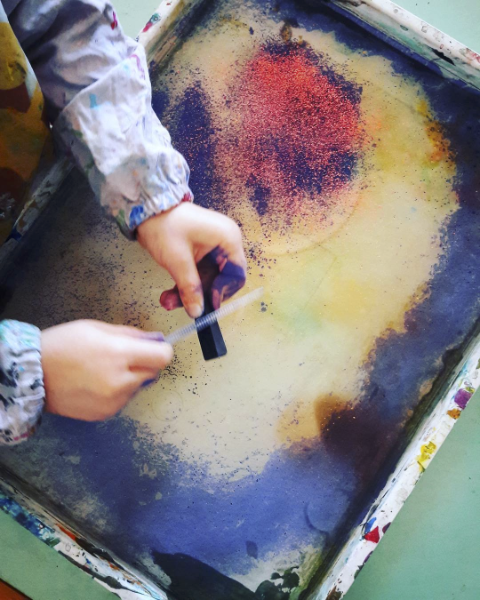
- Scrape pastels with a disposable knife.
- Stick wet paper to windows or plexiglass – it will fall of when dry.
- If your paper warps during the drying process, place it under a stack of heavy books overnight.

- Finish artwork can be hung as is or used for art and craft projects. We also like to use ours as backgrounds for paintings, collages and for making personalised gift wrapping paper.
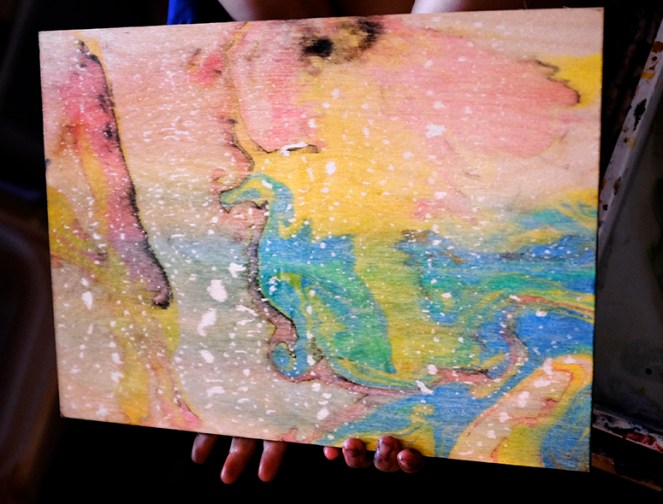
- Experiment marbling different surfaces such as wood or fabric. Here is Adèle’s marbled wooden panel:
To see more of her Suminagashi art, follow Adèle on Instagram or view her website.
Have you tried Suminagashi with paints or using non-paper surfaces? If so, we love seeing your creations! Remember to tag me on Instagram as @Rainy.Day.Sunny.Play and use the #Rainy.Day.Sunny.Play hashtag.

I remember doing a similar project when I worked in my preschool class. It turned out so pretty!
LikeLike
Did you use inks or something else? I’ve done it with small preschool children too when I used to teach and they were always so happy. I think it’s the combination of water and colours that makes it extra special
LikeLike
When you first described suminagashi it looked complicated but then I see this child doing it and it looked like so much fun. I will try this with my family.
LikeLike
The first time she tried it, she was only 1. But it was too difficult for her to put the paper in, so we tried it again after 3. I usually do it with her because it’s so relaxing. You will see, it’s really fun!
LikeLike
What a cool concept, we love art in this house. I had not even heard of this before, but now I am going to give it a try! Beautiful work.
LikeLike
Thank you! I’m happy to hear that. I’d love to see what you make! ❤
LikeLike
This looks so fun!! What a creative and artistic outlet for a child, mindfulness is so important!
LikeLike
I’ll be posting more articles about mindfulness soon, so stay tuned. 😉
LikeLike
Ooh those are cool and look like so much fun! I have never heard of that type of art before. I want to try it myself.
LikeLike
Let me know how it turns out when you try it. This is our favourite activity at the moment.
LikeLike
This would be a great mindful activity! I like the tips you shared too, I sometimes struggle knowing what to expect the first time I try a new activity!
LikeLike
I know how you feel about expectations. Sometimes it’s a real struggle to get the things to look a certain way. The nice thing about Suminagashi is that you don’t have to decide – the water makes the ink move around and so you just get lost in the moment. That’s the beauty of it. It allows you to detach from expectations.
LikeLike
I’ve never seen anything like this before but it looks like such a fun craft for kids to do! I’d love to give it a try with my niece and nephews!
LikeLike
It’s fun for adults to try, too. 😉 Let me know how they like it.
LikeLike
I have a little artist who loves trying new things. She would absolutely love this. I’ve seen paper marbling but I never knew it was fairly easy enough that we could even try it.
LikeLike
There IS a more complicated way – the Turkish art called Ebru. But it’s not very safe and I don’t do it with my daughter. However, I’m working on finding a non-toxic solution to make more Ebru-like art with her and once I do, I’ll write another article so stay tuned. 😉
LikeLike
I’ve never heard of this before but it looks and sounds great and like a lot of fun for kids. I’m sure my kids would adore something like this!
LikeLike
If you try it with a few kids at the same time, I suggest having different trays so that each child can do it independently. It can be a bit “addictive” so sharing might become a bit difficult, especially if they are smaller.
LikeLike
I love painting and can’t wait to try this with my nephew and nieces! Such a fun and memorable experience!
LikeLike
If you love painting, then you’ll be surprised at all the unexpected things that happen with Suminagashi. 😉
LikeLike
This is such a great idea and I really love the outcome. I think it’s something I would quite like to try myself! Mindfulness is such an important thing.
LikeLike
It’s an activity for all ages really, so try it and let me know how it works out!
LikeLiked by 1 person
It’s so important to expose kids to the arts from an early age. This is a great way to tap into their creativity.
LikeLike